So, this is your first time with an Android TV Box? Don’t worry—it’s easier than you think! With just a few simple steps, you’ll turn your regular TV into a smart one.
You’ll soon be streaming your favorite shows, accessing thousands of apps, and even browsing the web—all from the comfort of your couch.
Ready to get started? Just follow this guide, and you’ll be enjoying a world of entertainment in no time!
Check out: How To Change Main Monitor?
Step 1: Unbox the Android TV Box and Prepare for Setup
First of all, you need to make sure that you have everything in place to get started. Open your Andriod TV Box packing, and take out:
- Android TV Box
- HDMI Cable
- Power Adapter
- Remote Control
- User Manual (which you can skip for now)
Place the TV box close to your TV. It’ll be easier to connect the cables and manage everything if it’s not far away. If you lose sight of the HDMI port on the back of your TV, try using a flashlight or your phone’s torch for better visibility.
Step 2: Connect the Android TV Box to Your TV
Now that you have everything in place, it’s time to connect the box to your TV. Ready?
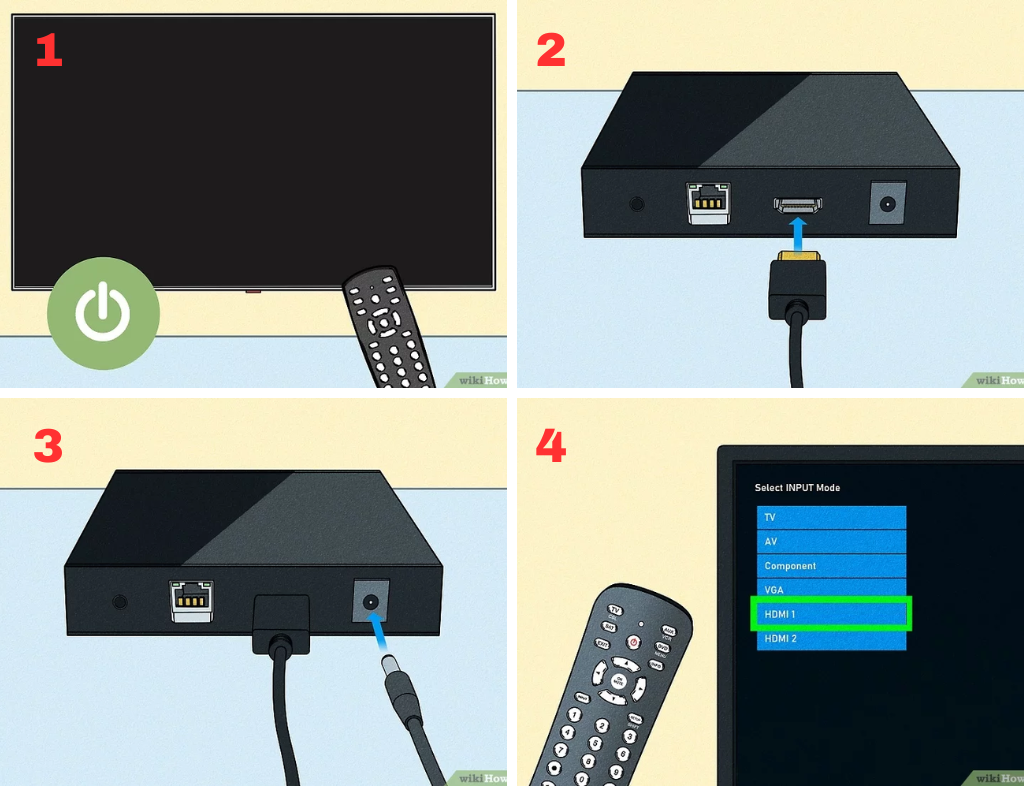
- Turn Off Your TV
Before making any connections, turn off your TV. This step might seem unnecessary, but it helps avoid potential display issues. - Plug in the HDMI Cable
- Find the HDMI port on the back of your Android TV box and insert one end of the HDMI cable.
- Locate an available HDMI port on your TV (usually labeled as HDMI 1, HDMI 2, etc.). Plug the other end of the HDMI cable into the TV’s port.
Example: If your TV has multiple HDMI ports, make a note of which one you’ve used (e.g., HDMI 1) because you’ll need to switch to this input later. This will help you avoid confusion when switching between different devices.
- Connect the Power Adapter
- Plug the power adapter into the Android TV box.
- Insert the power plug into an electrical outlet. The TV box should power on automatically.
If the box doesn’t turn on immediately, use the power button on the remote or on the TV box itself.
Step 3: Select the Correct Input Source on Your TV
- Use your TV remote and press the “Input” or “Source” button. This button cycles through the available input sources.
- Select the HDMI input where you connected the Android TV box. Look for labels like HDMI 1 or HDMI 2.
If you connected your box to HDMI 1, select HDMI 1 from the TV’s input menu. You should now see the Android TV welcome screen.
Now, if you don’t see anything on the screen, double-check the HDMI connections and make sure the TV is set to the correct input.
Read More: How to Unlock Your Keyboard?
Step 4: Pair the Remote Control with Your Android TV Box
Pairing the remote ensures that it communicates correctly with the Android TV box.
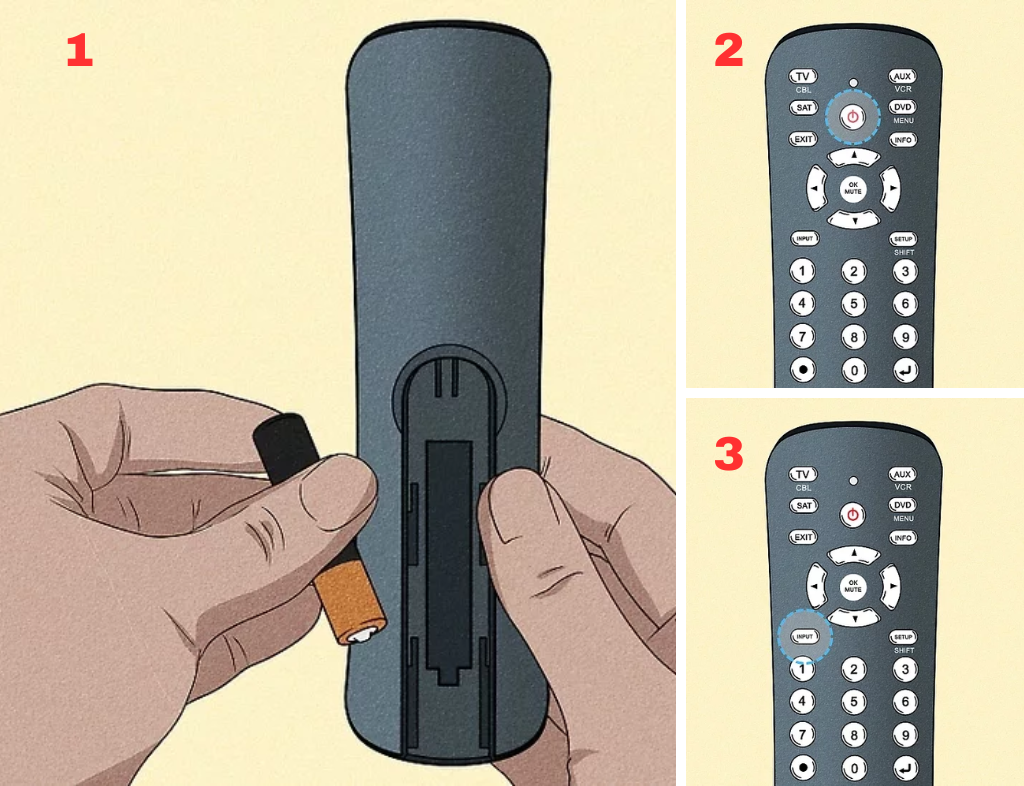
- Insert the Batteries
Open the battery compartment of your remote. Insert two AAA batteries. Make sure they are aligned correctly (positive to positive and negative to negative). - Pairing the Remote
If a pairing screen appears on your TV, follow these steps:- Hold the “Back” and “Home” buttons on the remote for 5 seconds.
- Release the buttons when you see a confirmation message on the screen.
If the remote doesn’t pair, move closer to the Android TV box and try again. If pairing still fails, remove the batteries, wait 10 seconds, reinsert them, and repeat the process.
Step 5: Initial Setup and Language Selection
After pairing, you’ll be greeted with the initial setup screen.
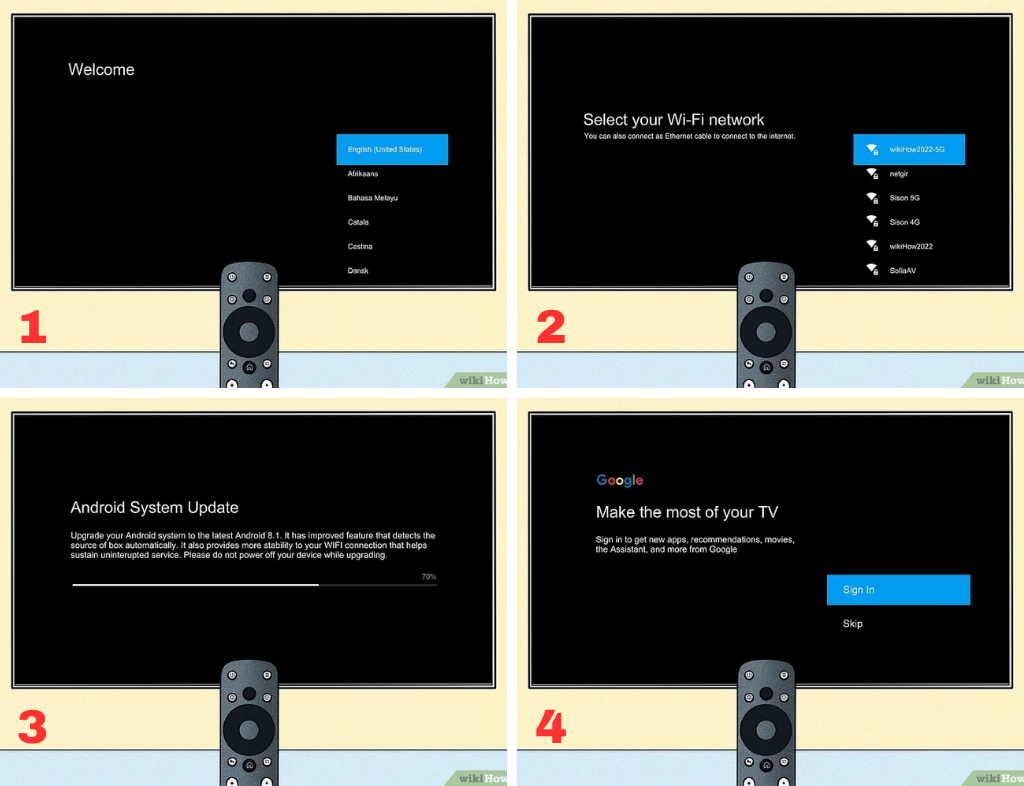
- Choose Your Language
Use the remote to scroll through the available languages. Highlight your preferred language and click the “OK” button to confirm. - Connect to Wi-Fi
- Select your Wi-Fi network from the list of available networks.
- Enter your Wi-Fi password using the on-screen keyboard. Use the navigation buttons on the remote to move between characters.
If your Wi-Fi network name (SSID) doesn’t appear, make sure the router is powered on and within range. Consider restarting your router if the network still doesn’t show up.
- Update Software (if prompted)
Your Android TV box may prompt you to update the software. Allow it to update if available. This process may take a few minutes.
You should keep the box connected to power during the update to avoid interruptions.
Step 6: Sign In to Your Google Account
To access the Google Play Store and other services, you need to sign in with your Google account.
- Select “Sign In” on the screen.
- Choose either “Use your password” or “Use your phone or laptop.”
- If using a password, enter your Google account details using the on-screen keyboard.
- If using your phone or laptop, visit the URL displayed on the TV screen, and enter the PIN code.
If you’re signing in using a phone or laptop, make sure it’s connected to the same Wi-Fi network as the TV box.
It is better to use a secure Google account. If you don’t have one, create a new Google account to avoid sharing personal data on a shared or guest account.
Step 7: Customize Settings and Install Apps
Now that your Android TV box is set up, it’s time to personalize it.
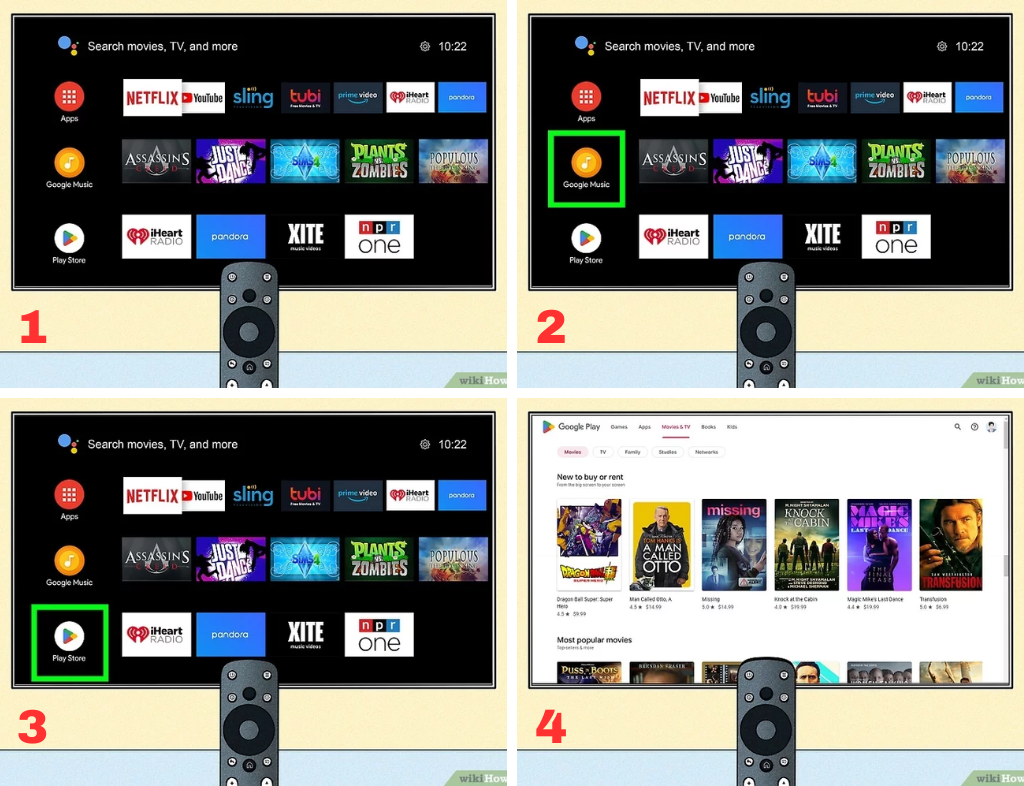
- Access the Settings Menu
- Go to “Settings” from the home screen.
- Adjust display settings, screen resolution, and sound settings to match your preferences.
- Install Apps from the Google Play Store
- Navigate to the Google Play Store app.
- Search for popular streaming apps like Netflix, YouTube, or local TV apps.
- Click “Install” to add them to your TV box.
If you’re in the UAE, consider downloading regional apps like Shahid for local shows or BeIN Sports for live sports events.
It is suggested to organize your apps on the home screen for easy access. Long press on an app and move it to your preferred position.
Step 8: Explore and Use the Android TV Box
- Navigate the Home Screen
Use the remote to scroll through rows of recommendations, installed apps, and games. - Use Voice Commands (If Applicable)
Press the microphone button on the remote and say, “Play Stranger Things on Netflix,” or “What’s the weather?” for quick actions. - Access Streaming Services
- Open apps like Netflix or YouTube.
- Sign in to your accounts and start streaming.
You may use apps like Google Play Movies & TV for rentals or purchases. Go to YouTube to watch free content and subscribe to channels.
Step 9: Troubleshoot Common Issues
- No Signal on TV
- Check that the HDMI cable is securely connected.
- Switch the input source to the correct HDMI port.
- Remote Control Not Responding
- Replace batteries if the remote isn’t working.
- Re-pair the remote by holding the “Back” and “Home” buttons for 5 seconds.
- Wi-Fi Connection Problems
- Move the Android TV box closer to the router.
- Restart your router and reconnect to Wi-Fi.
Keep your TV box software updated for the best performance and security.
Final Thoughts
So—you have successfully set up your Android TV box. Now you can enjoy streaming, browsing, and exploring the vast world of smart TV apps. Adjust the settings as needed, install your favorite apps, and experience entertainment options.
You may visit https://www.wikihow.com/Set-Up-Android-TV-Box for more insights about how to set up your Andriod TV Box. We used it as a primary source for accurate data collection.

